Showing posts with label moderns. Show all posts

Sunday, 10 September 2017

More Modern Spearhead

We played 3 more games of Modern Spearhead, all based in the mid-70s, meaning ATGWs were much less prevalent than RCLs. First up was half a Polish Division attacking a British Brigade.  The Poles were an Infantry Regiment in OT-64s, organised as three battalions (the regimental tank battalion's 3 companies having been attached out to the infantry battalions), plus a tank regiment.  The Polish tank regiment organisation at this period was highly unusual, since it consisted of 5 largish tank companies, plus various supporting elements, with no battalion-level structures. In MSH it counts as a single very large "Battalion": in this case, it was some 30 elements strong once attached assets had been factored in.

The Poles hastily attacked with 800 points against 600 of British, who were organised in 3 battalions IIRC: I not only forgot to take photos (although Rhys has some here) but also notes as well. I do remember the Wombats performing credibly, and the Chieftains being, as usual, incredibly hard to shift. But the game was something of a draw, with Polish numbers making their presence felt in several close assaults.

The second game was another where we forgot to take photos... For  change, I took command of some of Rhys' American figures, while he ran Czechoslovakians at me. I defended, and not being used to such a tiny force, added an "A" option to bring myself up to 650 points.  This still left me with only 2 battalions; neither of which was full-strength. One was however reinforced with an ACAV troop in Sheridans. These performed quite well, as they were placed behind M60A1s that drew enemy fire, meaning their weak armour was seldom tested. Rhys had the standard 2 regiments that MSH "WarPac2" nations can field on attack under Keith's scenario system: an infantry regiment organised as 3 battalions (with attached out tanks), plus a 3-battalion tank regiment. All 6 moved on-table in the first bound, as Rhys didn't like the odds of flank marching (a 6 being required). How did the battle go? Let's suffice to say that Rhys scored 1 point (a single contested objective), while I scored 15 (even after subtracting the 1-point penalty for the A option), which was commuted to 10...

Set-up for the last game. The 5 objectives are the red dots. Germans defending. Dotted paths represent reserve commitments.
For the 3rd, I finally managed to take a few pictures. I took Czechoslovakians, while Rhys took a West German force with Leopard1A3s and Marders. This amounted to 3 small battalions totalling a paltry 29 elements (28 plus an observer). Accordingly Rhys chose to sit back, covering only the 3 objectives nearest his baseline: two summit points, plus a bridge. He had no effective way to contest the summit point in front of my centre (being on a forested road), but the one to my near left (a town sector spanning a stream) was at least covered by his tanks, being in a relatively terrain-free valley.

Of my 3 tank battalions, I flank-marched one (path B on the map), while I initially kept the other two in reserve. As it turned out, they both got fired upon quite early, and had to commit themselves a bit sooner than I had planned.  My infantry regiment was tasked with the initial advance; as usual, its tank battalion was attached out to the three infantry battalions. Being a 1970s game, this attached-out tank battalion was smaller than the equivalent 1980s formation; each company being 2 MSH stands, and not 3. The central battalion had to make its way through dense forest, and thus was slowed down considerably (path "1" in the deployment map). This did mean, however, that it almost no casualties in getting into a position where it could start to assault the German centre.

The photo to the left shows one stand of mine that I had brought out with me from Japan (the OT-810D), with the others being Rhys' own. Rhys cuts the corners off his HQ stands to make them more easily recognisable. I think I'll do this with mine too, because HQs don't shoot, and thus don't really need full-length straight edges for all base sides. I might keep the front corners, as this makes it easier to see if an armoured element is being flanked or not.  The OT-810D is a conversion from an H&R Sd.Kfz.251. It's not a very useful vehicle in an attack game, alas, since it can't do a half-move and fire like a tank can.

The battalion on my right (path "3" in the deployment map) advanced steadily, and some awkward fire angles from Rhys' perspective kept my casualties down. In contrast, the battalion on my left (path "2" in the deployment map), faced with the most open terrain, got hammered. I was hoping to catch Rhys in a pincer with my flank-marching tank battalion, but it never turned up. The "A" tank battalion was able to support it on its right, but it took too many casualties on the left, and broke. Tank battalion "A" was itself eventually broken as Rhys' battalion in the area, not seeing any flank marchers turn up, was able to move towards the centre.

The climax of the game.
Unfortunately for Rhys, elsewhere on the field, he had not been able to whittle down my forces enough to stop them moving up into positions where he could be close assaulted (although some LARS rocket fire didn't mean it was all plain-sailing for the Czeschovakians...)  In the centre, Battalion "1" was able to over-run the infantry defending the village just beyond their first objective, and a combination of artillery fire and supporting tank fire was enough keep the rearward German elements from interfering. And on the right, a dearth of German tank support meant opportunities to pick off my advancing elements couldn't be capitalised on: those Marders may be very tough for the period, but they do cost a lot of points...

Outnumbered Germans attempt to hold the line...
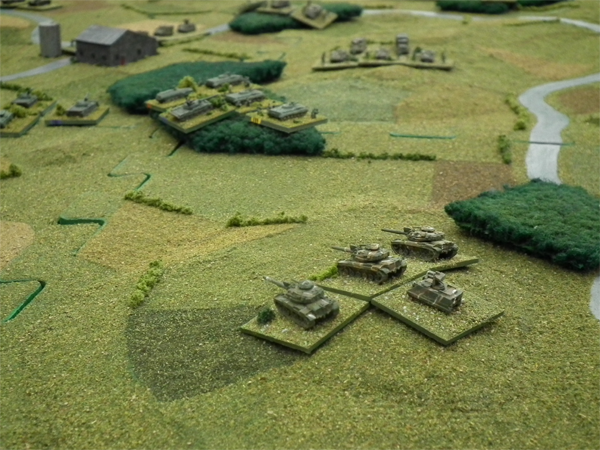
On my centre-right, a wooded hill was stoutly defended by a combination of armour and Panzer Grenadiers. This was attacked head-on by my "C" tank battalion; you can spot attached some OT-62 infantry platoons in support in the photo to the right. The battle was relatively even, with my greater numbers about making up for their poorer equipment. Eventually this defending force was faced with encirclement as my "1" and "3" battalions started killing the defending elements in front of them, allowing them to manoeuvre more freely.

Although Rhys had broken two of my battalions ("2, and "A"), and left a 3rd in bad state ("C"), he was not in a good position. I had claimed more objectives than he had held, had two decent battalions left on-table compared to his one, and had another one off-table that - at some point - would eventually take his one decent from directly from behind. A clear - albeit far from bloodless - victory to the Czechoslovakians.

Sunday, 3 September 2017

Back to gaming!

Having arrived at Rhys', the first item on the agenda (after ascertaining the state of his latest batch of stout) was to flock and affix the final woods to a couple of his terrain boards for use in (M)SH while he was finishing up at work. 

6 terrain boards assembled for action
We then made up some lists for the first game: Soviets against Americans, 1974.  I suggested this date so as to have a game with minimal ATGWs for once. Soviets are more expensive than Czechoslovakians, and I also turned out to be in a Hasty Defence posture, meaning my force was quite a bit smaller than I am accustomed to.  I had "just" a single Motorized Rifle Regiment, organized as just 3 battalions (the tank battalion was attached out to the rifle battalions). The terrain was reasonably well distributed across the board, with no particularly obvious concentrations nor open spaces.

With so few manoeuvre elements, I decided I had to deploy all 3 on board; arranged 2 up, and 1 back in the centre. Of the six boards, that on my left flank was missing an objective. I suspected Rhys might flank march, and the question was would he march on my right, to aim for the extra terrain objective there, or go on my left, because that would be sneaky?  I figured him moving to my left wouldn't be so serious, as I would have more time to react to it, while to the right would be a bigger problem.  So I put my 3 towed T-12 anti-tank guns in ambush positions on my right to cover the most logical entry points.  As it turned out, he did flank march, but on my left..

To cut a long story short, despite me failing to get any artillery into action for ages (first four roles were 1s....) Rhys managed to immolate himself on my defensive positions while his flank march stubbornly refused to turn up.  And when it finally did arrive, it had nobody to fight, and no objective to take.  He threw in the towel, and was rather surprised to learn he had managed to kill just 4 (count 'em!) of my stands, while having lost two battalions in the process, and having secured just 2 objectives (and one of those none too securely...). Lessons learned?  Hmm, Soviets are much harder to confuse with electronic warfare missions than Czechs are?   Nah, that one's obvious.  Rhys' boards are working out well? Yes!  Just the right amount of terrain density to get that 1000-metre West German average sight line...

Saturday, 7 January 2017

Mi-8s


H&R 1:300th scale Mi-8 "Hip"
It's been over a year since I painted anything, but something has finally been done: a pair of Heroics & Ros 1:300th scale Mi-8s for my Czechoslovakian ground forces.

These had been sitting in one my "undercoated but awaiting further painting" trays for several years, because finishing looked a bit of a challange - camoflage would have to be applied, and they would have to be numbered, etc. As it turned out, the job wasn't too dificult.  Of course I realise that two models isn't exactly a huge dent in the proverbial lead mountain, but from small beginnings do great things grow...

The Mi-8, or "Hip" in NATO parlance, was the standard WarPac utility helicopter throughout the 1970s; an upgraded version, designated the Mi-17, was introduced into Czechoslovakia in the mid-1980s; it can be distinguished by having the tail rotor on the other side of the vehicle. 

Unit 0812 of the 51 vlrp, modelled ca. 1980.
No. 0812 belonged to the 51st Helicopter Regiment, which was part of the 4th Army, and is thus suitable for use with my usual ground formation: the 3rd Motor Rifle Division. Although a utility transport helcipter, the Mi-8 can be found armed as a makeshift gunship, usually sporting large amounts of rockets, which in MSH amounts to a very poor anti-tank attack factor, but a good anti-infantry one (factor 7).

The missiles should be extra rockets...
The Mi-8, while a "medium" transport helicopter, is nonetheless a very large vehicle, and is noticeably larger than e.g. an Mi-24 "Hind". The base size here is 90 mm square - in contrast, the H&R Hind-D, if turned somewhat askew, will just fit on to a 60 mm square base.  I base my helicopters on the ground, mostly because I've never found a way of representing moving rotors that I've been entirely happy with (the plastic disks some people use don't do much to me... )  This way, I don't have to wrestle with the problem: the unit is parked, awaiting orders, and the engine isn't even fired up! 

Deploying (half) a paratroop battalion.
In MSH a standard Hip model can transport up to 3 stands of infantry at once. This is why my bases are 90 mm square, rather than the 80 mm that the model could fit on to: it coincides with the deployment width of 3 bases of my infantry. I only have two models, and thus can't transport an entire paratrooper battalion at once, which is probably entirely realistic, because the Czechoslovakians would have really struggled to do so in any real life conflict.  In game terms, either I will have to transport a weakened battalion, with just 6 fighting stands (aided by my lone Mi-4 model taking the HQ stand), or be forced to take two trips to insert a full-strength unit.  Which, all said and done, doesn't sound any more doable on tabletop than it does on a real-life battlefield swarming with AA systems. Unfortunately, under Keith McNelly's scenario system, a half-strength battalion isn't sufficient to claim an "objective", only prevent an enemy from claiming it...

Scratch-built BzK vz. 59 in centre fore.
The Mi-8 was just large enough to take a GAZ-69 jeep equivalent through its rear doors, which is important, because this was the standard tow for the primary Czechoslovakian infantry battalion-level AT weapon system: the BzK vz. 59 RR. This was a heavy 82 mm recoiless rifle, with capabilities almost comparable to an 85 mm AT gun, but weighing considerably less (but at nearly 400 kg, still clearly far from being man-portable like the SPG-9 found in other WarPac forces). Thus, an infantry battalion's entire weapons inventory could, in theory, be helicoptered into a conflict zone. 


Wednesday, 9 December 2015

Some moderns painted!

I've finally got around to doing something constructive over the last two weeks in terms of converting lead (and plastic) into fieldable forces. The catafracts still lying on my sidebench still looked too daunting a task for just a few evenings, so I went to my moderns trays to see what could be fruitfully pushed forward.

First up is another MSH battalion's worth of DANA vz.77 152 mm gun-howitzers to add to the one I already have. These are the Heroics & Ros 1:300 th scale model that was released in late 2012. For this second battalion, I've put the gun into travelling position (the barrels can also be positioned elevated). The previous battalion is intended tp represent a battalion from the 4th Army's 332nd Artillery Brigade; they received their DANA's only in 1985. This second battalion represents one of the divisional artillery battalions from either the 1st Tank Division or the 20th Motor Rifle Division; these being the best equipped of the Czechoslovakian divisions; they received their DANAs in 1980.


Next comes a PM-55 bridgelayer. This is a model by Karl Heinz Ranitzsch, aka Dragoman, done, like all my Shapeways purchases, in the cheapest plastic available - nylon-12 (aka Shapeways' "white strong & flexible").  The PM-55 is essentially a truck-borne version of the MT-55 bridgelayer, and thus suitable for MBTs to cross. WarPac MBTs at any rate; with a rating of 50 t, some western MBTs would be straining things... A model like this is only required for the single game turn it takes to set the bridge up - but it's such a beautiful model, I couldn't resist. The truck concerned is the Tatra-813 ("Kolos") 8x8 vehicle in production from 1967 to 1982, and with exceptional off-road capabilities due to its tubular frame split axle configuration. Karl Heinz sells not only the unfolding version shown above, but also a version in travelling configuration (plus a deployed bridge section).

And here is the travelling version... The PM-55 routinely sports a earth moving blade at the front to prepare the approaches to the bridging position, and Karl Heinz' model comes equipped with this. Like many Czechoslovakian pieces of equipment, the PM-55 saw some degree of export success, and this is why Karl Heinz models it - it served with the NVA (East German army).


And this is Karl Heinz' model of the AM-50, a lighter VLB that is also based on the T-813, and more suitable for infantry units being carried around in APCs. Like the PM-55, he sells an unfolding version; I've already paointed one of those up - you can see it in action here. The AM-50 was first trialed in 1972, with more substantial numbers coming in1974.

This is an attempt at making a vz.53/59 self-propelled AA gun. I've taken an H&R (?) BTR-152 model, and sawed off the back. Then I've stuck a ZPU-23/2 on top, and stuck on plasticard box on top of that to represent the distinctive ammo bin, and added some crew members from the artillery crew pack, The guns are noticeably too small (to me, anyway), since the vz. 53/59 sports twin 30 mm cannons, as opposed to 23 mm, and the curving superstructure on the left of the mount is missing in my model (not that you would see it from this angle, even if it was there...). IIRC, I've now made up sixteen of these conversions; this is the last, and will form part of my 183rd Battery of the 82nd AA Brigade - this unit was primarily equipped with SA-4s, but also had some SPAAGs for close-in air defence. The Czechoslovakians used this instead of the ZSU-57-2, which offered them no advantages. However, they never replaced it with anything more modern (such as the ZSU-23-4), and its lack of radar would have meant it would have had severe problems keeping enemy aircraft at bay in any conflict in the 70s, let alone the 80s. The Czechoslovakians trialed the SA-4 from 1974, and the 82nd AA Brigade went operational in 1976 (the 2K11M, i.e. "SA-4b Ganef").


The two vehicles are my own creations, printed out by Shapeways. They are Tatra 815 VT 8x8 prime movers, distinguished from the T-815 VVN truck mostly by having a shorter deck but a longer cab, so it can accommodate an entire howitzer crew. The T-815 series (also available in 6x6 and 4x4 versions) suceeded the T-813 starting from 1981, and going into full production in 1983. In addition to hauling artillery pieces, it could also be used to tow tank-transporter trailers, etc.

I think this is what Skytrex called a "BTS-M"; it's a PTS-10 light ferry as far as I am concerned. It's a fairly large model, hence the double-depth base. My bases are usually 30 mm square by the way; no way am I using Imperial measurements! The model has an odd lean forwards, as if it's braking extremely hard. Two of these models get used as part of the Pontoon Company of my Czechoslovakian 3rd Division's Engineering Battalion (along with a whole bunch of truck-borne pontoon elements).


And this is, IIRC, a Skytrex GSP-55 heavy ferry set. These are found in the (river) Assault Company that was added to Czechoslovakian divisional Engineering Battalions from 1979, along with extra PTS-10 light ferries.

Another artillery battalion... you can never have too many as a WarPac player! The tractors here are another of my own products printed out by Shapeways: the ATS-59G. The ATS-59G was the first 3-d printing effort I tried, and it still holds up reasonably well compared to my later creations.  You can see a close-up of the vehicle's rear below.


Now when your artillery is as ancient as these pieces, you need a lot of them to have any hope of doing anything! This is the H&R M-30 122mm howitzer (I think they call it something like mk. 31/37), or the vz.38 to the Czechoslovakians. These pieces were found in the artillery battalion of the motor rifle regiments: 3 batteries of 6 pieces, which translates to 4 models in MSH. The vz. 38 designation tells you they are a 1938 production piece, so they have, by 1970s and 80s standards, a truly horrible range. These pieces soldiered on until the demise of the Czechoslovakian state (there were grand plans to replace them with 2S1s in the late 70s/early 80s, but few of these were actually purchased). My close-in eyesight has detriorated markedly over the last two years, so I now need separate glasses to paint with. Even so, I found I couldn't be bothered painting the faces on the crewmen here - I just couldn't see them! And I certainly can't see them at a gaming arm' length away...

This would appear to be a T54 or T55-based ARV vehicle, but I can't remember which manufacturer it is... probably Scotia.

While this would appear to be a T-34-based ARV. Again, not sure who makes (or made) it. A platoon's worth of vehicles like this is part of each tank or motor rifle regiment's enegineering company; more are found in the divisional Engineering Battalion's maintenance company.

The towed tank here is I think a Scotia POL trailer, while the tractor is another of my Shapeways creations: an AT-S. These are usually found hauling artillery pieces in my forces. The AT-S was a design from the early 50s, and superceeded by the ATS-59G. To my-brought-up-in-New Zealand mind, it's got a definite "Hillary crossing the Antarctic" feel to it.

Travelling in a fried-out combi! On a hippy trail; head full of zombie...  Well, near enough, anyway. This is the Scotia UAZ-452 minivan; I will probably add some ambulance markings in the weekend to it to give it some sort of utility.

This is the van version of Scotia's UAZ-452. I will probably add some sort of diorama scene here, given the large expanse of available base, but I will have to buy some more crew figures and the like first, as I appear to have run out...

Tatra-111 trucks; one of which was already painted. Another of my Shapeways efforts - these ones have suffered from very noticeable "stepping" during the print process. These trucks can be used not only for Cold war Czechoslovakians, but also for WW2 Germans, being produced from 1942 to 1962 (by which date the cab had been given a more modern look).

H&R assault rafts. WW2 German, I believe, but who can tell the difference? Me, of course! Czechoslovakian ones were not even inflateable!

No idea why I have this - it's a Scotia decontamination vehicle. And why do I not need it? Because I've already made the Czechoslovakian equivalent of this Soviet vehicle, and printed it out via Shapeways! A stationary pair of these vehicles, each mounting a jet engine on the back, were supposed to decontaminant chemical warfare agents from a column of exposed vehicles driving between them. As a professional chemist, I have doubts about the efficacy of this... These vehicles were found as part of the divisional NBC battalion. WarPac forces took a lot of effort regarding counteemeasures for the C part of the NBC equation, even though it appears they naver had any serious intention of using themselves (unlike the N part, for which they had serious plans for...).  For example, FROGs were in service for over a decade before a chemical warfare warhead was even considered for them.

Another Scotia Soviet duplication, for which I have the Czechoslovakian equivalentalready printed out... It's quite a nice piece of kit, though.

A battery of BM-24 MRLs; another of my Shapeways creations. These weren't used by the Czechoslovakians. They were instead found in Soviet Tank Regiments in the 1960s, prior to being replaced by the BM-21 Grad: 12 per regiment. I made up the model since it's just an AT-S with a launcher on the back deck instead or a tarpaulin, so a relatively easy conversion..

And finally, this would appear to be a Scotia BAT, but it's missing what i consider to be the most important part of the protoype - the enormous dozer blade, which is a real shame, because the thing isn't easy to scratch build...

So, a bunch of rear-zone elements for the most part, but that's fine, logistics can be fun too!


Sunday, 22 November 2015

Brigade Commander

Our second game was something rather different from the first, what with using 1:300th moderns instead of 15 mm ancients, and with a new rules set to boot in place of my usual Modern Spearhead. The rules are called "Brigade Commander",  and cover both WW2 as well as moderns; Aaron suggested I take a look at them, because he had heard they were fast play. 

Initial set up, from behind my right flank.
We have a great problem when we pay Modern Spearhead in that we seem to take over an hour a bound on average, so getting a game actually fininished is a real task. I'm not one for trying new rules out willy-nilly, but something clearly had to be done, so I took a stab - they are a ten buck downloadable pdf, so I wasn't going to exactly break the bank taking a look. A quick once-over gave me the impression that would indeed be fast, and they also had a couple of mechanisms that were rather similar to a homebrew set I made back in 1989/90, so that was another plus: one was having attachments one lower down the command chain represented as smaller bases tagging along with the big base (only my rules were a "Division commander" equivalent, so one level higher up the command chain). Another was having effectiveness of fire vary with relative technology as opposed to have fixed effects - this is exactly the way forward IMNSHO, so I don't understand why more rules writers don't adopt it. I am doing the same in my may-they-ever-see-the-day ancients set too.

On the other hand, some bits were really confusing - especially the unit displacement rule - when you first spot a defender, it gets moved randomly to a slightly different position.  We just couldn't get our head around that one - why should a defending unit hiding in cover be teleported outside of it when it is first seen? So we just ignored that one.  (Maybe we simply didn't understand it properly - our brains aren't what they were when we were younger...)

Being a plonker, I left my printed-out copy at work, naturally, but we could still access the electronic version to play -  internet to the rescue! We rolled up our forces pretty well much randomly, going "by the book". I had Aaron's Americans as "stretched", so his force would be smaller (but naturally, the tanks are way better - their 105s are vastly superior to my 100 mm guns); my Czechoslovakians infantry/MICVs had a miniscule advantage over his infantry in M113 APCs in that I could let off anti-tank fire at a greater distance - needless to say, I never got to use it...

Yankee mechanised company in front of a T-55 company.
I planked down some terrain - which was four of my terrain mats, giving a 1.2 by 1.2 m board (i.e. 4 foot a side) with forests made of carpet tiles thrown over the top; these last I snagged from Rhys when I was last back in NZ, since they were now surplus to his requirements.  We ignored any hedgerows, given the basic unit was a company, rather than a platoon as in MSH. We also ignored difficult fields, but that was more because we entirely forgot about the possibility of having them being difficult!  It was one of a number of things we forgot during the course of the day (e.g. I couldn't find any of my bridge models, so no rivers could be used).

Aaron's game objective turned out to be "hold area against enemy" - he chose a hill just on his side of the centre line that had a good view of a lot of the board to be the key location.  Mine objective to exit at least 1/4 of my companies off his baseline.  I got two extra companies in compensation for him being able to take a defensive stance, further inflating the numbers discrepancy (he had 6 companies on table at the start, plus one as reinforcements; while I had 8 plus 3, respectively). The recommended 'base size' of company is extremely hazy in the rules. They talk about 1", 2", and 3" bases sizes in a single passage...  Since there is at least a defined ground scale (1" = 100 yards), I took that into consideration when decreeing we would use three MSH bases to represent a standard company, with ranges being taken to and from the middle one; the flanking ones would be to make sure they occupied a realistic amount of space.

Turn 6. Aaron (top) has been forced to retreat numerous times.
I had some good initial luck with me being able to get a good march onto the table through a timely "scurry" where everybody got to move:  this would appear to be, relatively speaking, generally better for the more numerous side if it happens on the first time - normally you get only three company activations a turn, so usually a smaller force gets a smaller proportion of its units to move. The first few turns saw most of our more lethal artillery assets (of which I had more) exhausted; whether it was wise to do so initially or later I didn't know, give it was our first game. And since this was a first game, there were no doubt many things we stuffed up rulewise too...

Once we really started coming to grips with each other, I kept scoring 1s or 6s on my "shock" dice, forcing Aaron's units to fall back constatantly. In fact, it looked like he was running out of room to retreat at some points, with some of companies falling back even beyond his HQ. On the other hand, my poor tankguns meant I was never in a position to land any "kill" dice on him, and my few assaults didn't work out. On the few occasions Aaron was able to actually get some shots of with his M60A1s, he was able to rip up my guys handily. I forgot to bring my smoke markers, so that part of the visual spectacle was AWOL; in the above picture we are using little 5 mm-a side coloured cubes to represent unit status. This should be done with appropriate dust, smoke, and fire markers...

Goddam Yankees! The American's are Aaron's own figures.
Anyway, I was making quite a lot of ground, but was taking quite a lot of casualties in the process. Eventually however, I not only started taking too many casualties, but got some "firefight" activations that prevented me from actually doing anything useful just when Aaron seized the initiative with a freshly rallied tank company that went on a rampage down my right flank, smoking up two companies in front of them, then sweeping round my flank (see left) and taking out two more.  Ouch!

Things were really really really not looking good for the Czechoslovakians at this juncture...
The casualties (Aaron's sole company lost at top).  Not pretty...

Now technically, I did complete my objective - I did get 3 companies of Aaron's baseline. But since he not only held his hill, but had but a single company rendered hors de combat while doing so, while I had lost seven (!) in getting my three off table, it was clear who the real winner was!

So what did I make of the rules? Well, they were indeed fast play. Very fast. You get maybe 6 to 12 companies total, and they are digital: they are either alive, or dead.  So no fiddling about with 'casualities' or the like as platoons get whittled down. No 'morale' as such to speak of, either - combat results can force you to halt, or retreat, but only on a company by company basis. And this is all fine. I'm not sure I like the way artillery was handled - will have to investigate more. Likely we mishandled it...

There are lots of things I would tweak in terms of 'army list' design - I think not having lots of attachments is likely to be more of a wasted opportunity than a useful simplification, but further play-testing will be required. Even if I don't end up liking everything, there is a solid core here that is very much worth investigating. The fact that we could slap a game together, starting with generating an OOB on paper, to packing it away after the game, in something like 4 hours maximum, was quite the revalation. It would probably take me 2 days to do that with MSH...


Sunday, 5 January 2014

Action at Oberickelsheim - Part VIII - Conclusion


By the 9th turn, it was only 1100 in game terms, but 4 o'clock in real life, and both Aaron and Pat had to leave at 5-ish, so we determined this would be the last turn.  The Czechoslovakian traffic jam on the southern flank had still to be resolved - there was yet another motor rifle battalion waiting to come on right there, and several more tank battalions were also scheduled to arrive over the next few turns, although these were to thankfully enter now mostly vacant roads to the north.

On the opposite side of the board, the US 2/30 Infantry Battalion had now arrived to reinforce the 1st Brigade's central sector, creating what appeared to be an impenetrable mass of American might.  And while this certainly looks formidable, it has one great weakness.  This massive concentration of force created what is aptly termed a "target-rich environment".   One of the problems with MSH is that there is a great incentive to bunch your stands together (concentration of firepower) with precious little penalty - because artillery fire, like all other attacks in the game, is generally conducted on an element-to-element basis.  "Generally", however, does admit of one notable exception - multiple rocket launchers.  And the one thing a Czechoslovakian force has going for it is an abundance of multiple rocket launcher stands.  Because most of the ones in the 15th Division were very short-ranged, they had yet to play any part in the battle, since they spent most of it moving into position.  But by the 9th turn, the last had arrived, and they were now deployed just shy of the table edge, waiting for somebody to give them a target.  How many MRL stands does a Czechoslovakian Division have at its disposal?  Fourteen!  That's enough, should they all be called in at once (an impossibility to be sure) to target every single American stand in this picture in a single bound.  And while there was no way the whole lot were going to be let loose at once, it was inevitable that some were going to be called in successfully.  See that village just below the ridge with the smoke marker next to it?  Four elements, right there (3 in the village itself, plus a stand of infantry lurking in the rear outskirts) capable of calling in rockets, all with targets galore to monitor.  Sure they might need a six to succeed, but one's going to get lucky at some point...

So, as is the nature of large but unfinished games, things were looking quite interesting just at the point we had to call it a day.  At the close of the day, Aaron's Americans had earned more victory points than Pat in charge of the Czechoslovakians, essentially due to the unanswered combat losses the Americans had inflicted until then.  On the other hand, looking to the future, the Americans had little hope of securing much in the way of their positional victory conditions, while three Czechoslovakian battalions were currently crossing the river to their north with not much the Americans could do about it, (short of the rain stopping, followed by some particularly spectacular airstrikes...), so their victory point lead was about to disappear.

So, what was learned?  Personally, I was satisfied by how it went.  We didn't get through as many turns of play as I had hoped - but got through more than I had feared! Of course, a game this size really does demand more than one active player on the WarPac side, but I think we did OK in that regard, all told.  And I like the way neither player lined up against each other in the manner I had expected they would - so there was a real fog of war element there even without any hidden movement (which would be totally awesome, but... work, work, work!) or troops deployed in hidden ambush position.

One thing that did become clear to me was I really do need some sort of base labelling scheme.  While I know my troops well, and can tell them apart (assuming I don't start crossing their command arrows, that is!), that doesn't apply when somebody else is commanding them, because then I have no idea from moment to moment which stands came from where.  And the player borrowing them certainly has absolutely no idea which stand belongs to which unit!  The little white sticker dots you can see in the photos were added by Pat as play progressed because he couldn't tell the command stands from the grunts, to say nothing of one battalion from another.  Now I've been reluctant to do this, because I don't like the look.  But a more discrete colour coding system along the rear edge of the base would be unobtrusive enough, I've decided, and couldn't be seen from above or the front.  So now I just have to come up with a scheme to get all the information I want, and yet retain enough simplicity - it has to be easy enough for someone who isn't me to understand, after all!

Action at Oberickelsheim - Part VII - the main clash


Don't you suppress me! Did you see that?
The rain continued throughout turn 8.  The 15th Reconnaissance Battalion couldn't quite extricate itself quickly enough from the American left flank forces, and its morale check resulted in it fleeing for two turns toward the rear.  This left the Americans in this sector free to transfer their attention to the advancing 1/68 Motor Rifle Battalion, which quickly began wilting under the attention.  Pat needed a coordinated attack here, but the nearby 1/20 Tank Battalion was only near by - it being positioned one turn behind was looking like it might be one turn not near enough.

At this stage of the game, Pat had had very little in the way of artillery to call in, because a lot of it was still moving into position off-table, but it was gradually coming on-line.  He had left both the divisional and attached army-level anti-tank battalions, each of 4 stands of towed 100 mm guns, off-table, figuring they would be of no use on-table in a meeting engagement as they would never get into a position to fire; instead he used them as light but long-ranged divisional guns - it was accepted practice for such field guns to be used like this because although they had a light shell, they had a very high rate of fire coupled with a long range: 21 km, longer than anything else in his inventory.  And even though he needed to get lucky suppression shots to touch Aaron's entirely self-propelled artillery, he did manage to take out a stand of M110s!

A nasty ridge line brimming with steel
Aaron's albeit less numerous artillery had come into action much earlier.  Pat had succeeded in infiltrating some stands, including a recon asset, into a village near what was turning into Aaron's "main line" of defence.  This could prove to be a thorn in Aaron's side later on.  However Aaron had at least isolated them, due to a devastating artillery barrage on the following-up infantry elements that were otherwise shielded from the guns of his tanks due to the terrain angles.  Here we see the bulk of Aaron's central forces along with some nervous Czechoslovakian stands in front unwilling to expose themselves to its massed firepower...

Here's the view at the end of turn 8, taken from the northeast.  In the foreground, 1/62 MR Battalion is about to start crossing the newly laid bridge over the river, and the following-up 2/62 MR battalion has backed up behind it, waiting its turn.  The surviving stands from the 15th Reconnaissance Battalion are streaming backwards up the verdant hill to their left, while 2/20 Tank Battalion, along with two stands of MTU-55s from the Divisional bridge-laying company, from the 10th Engineering Battalion, has just made it onto the board.  In front of them 1/20 Tank Battalion is coming under fire, and 1/68 MR Battalion is taking casualties and far too many suppression hits for its liking.  In the distance to the west a powerful American force lies deployed, waiting for their opponents to advance on them.  And in the south, the board lies strangely deserted of troops from either side...

During this turn, Pat finally managed to get an order through to get one of his southerly columns off the jammed-up road net, and moving across country.  Unfortunately for him, the Americans located the 68th Motor Rifle Regimental HQ as a result of lax radio discipline in the process, and called in heavy artillery on it.  Exeunt one RHQ stand.  No more order changes for them unless they came from the DHQ itself, and Pat wasn't willing to expose himself to the same risk of destruction quite yet...

Bridged at last!
The rain continued during the 9th turn.  In the north, the unopposed river crossing was finally under way: the lead elements of the 1/62nd Motor Rifle Battalion had finally made it to the western table edge.  Some victory points in the bag at last for the Czechoslovakians; who had yet to make any serious impact on any American fighting formation in terms of casualties.  To the south of the river crossing, the American Armored Cavalry had by now inflicted enough losses amongst the Green-rated 1/68 MR Battalion that it had to take an early morale test; it failed badly and evaporated.

The accompanying 1/20 Tank Battalion was also taking heavy casualties, with its front elements largely eliminated - its bridge-laying section suddenly found itself perilously close to the action!  You can see its lead recon elements hanging on virtue of being mostly protected from the American fire by the fact they are not "real tanks" and thus not the highest target priority for the opposing M60s....


Saturday, 4 January 2014

Action at Oberickelsheim - Part VI - the action intensifies

The bridge-layer moves up the column
Rain continued during throughout the 5th turn as the opposing forces continued to move onto the developing battlefield.  On the northern sector of the table, the Czechoslovakian BVP-1-equipped 1/62 Motor Rifle Battalion was somewhat surprised to find they had been able to march clear up to the river without contacting the enemy, so the vital AM-50 bridge-laying equipment that had been protected toward the rear of the column was suddenly need up front.  Yet more delays for the Czechoslovakian advance!

Mexican standoff...
Meanwhile, Aaron had made a small tactical error in his handling of the encounter between the two clashing recon battalions: he had moved an element of TOW-equipped M113s into the middle of a village.  This is a very poor place for such a vehicle to be, since you can't actually shoot our of the centre of a village: you have to move into the outskirts first.  Unfortunately, TOW-equipped vehicles can't shoot if they have moved, and there was a stand of BVPs waiting outside for him to emerge, ready to kill him as soon as he did.  Aaron's discomfiture in being trapped inside a village was compounded by the fact I had done exactly the same to him in our last game together; although that was more serious, involving bottling up a company and a half...  Rushing into a built-up area is only useful if you aren't going to actually want to shoot from it (observing is fine) - you need to actually make it to the far side for that. 

Half-way through turn 6 (0930 by the game clock), after Pat had moved, but before Aaron had, the rain stopped, giving Aaron the opportunity of bringing his air support to bear.  However, Pat succeeded in a radar-jamming EW mission, giving Aaron a dilemma.  He could send in his sole ARM-armed strike at the opposing off-table SAM battery, and attack it at a penalty (meaning he'd kill it only on a 5 or a 6), or he could wait a turn, knowing that Pat couldn't keep maintain his jamming mission, and attack at better odds (4, 5, or 6), but run the risk of the rain returning. He chose to delay.

Turn 6
Here's the view from the northwest corner of the board.  The bridge-layer accompanying 1/62 MR battalion has nearly made it through the waiting column to get into the crossing place.  Further along the river, the Czechoslovakian 15th Reconnaissance Battalion has started to take serious casualaties from 3/7 Armored Cavalry A troop as more of their stands move onto the hill between the village near the bend in the river and the approaching Czechoslovakian 1/20 Tank Battalion.  However, the main body of this battalion is as yet too far away to influence the fight - only their lead reconnaissance elements are getting close to the hill.  Coming across towards the northwest from the centre of the Czechoslovakian deployment zone is the 1/68 Motor Rifle Regiment, followed by the Divisional HQ which has just made it onto the table and is also moving in column up the centre - this was mostly a collection of EW stands (some were represented physically in this scenario) and towed AA guns.  Following up Aaron's 3/7 A Troop is B troop of the same Squadron, plus 1/30 Infantry, which is making for a ridge that another Czechoslovakian column - the 1/51 Motor Rifle Battalion - is fast approaching.  Beyond that, another Motor Rifle Battalion, 2/68, is backed-up, mostly off the table, waiting its turn to move down the road.  Pat was trying to get an order change through, and get it moving off the road, and more towards the centre of the table, but wasn't succeeding yet.

Turn 7 - the advance continues
Unfortunately for Aaron's plans, the respite from the rain was just that - a respite.  It immediately started raining again.  But it wasn't all bad.  All the mud was seriously compromising Pat's ability to manoeuvre the few combat elements he had that he could get off the roads, because his tracked BVPs were all in the north, where the enemy wasn't, while his wheeled OT-64s struggled forwards toward an increasingly dangerous looking American centre.  Here we see the lead elements of the 1/68 Motor Rifle Battalion attempting to move forward as quickly as they can to relieve pressure on the 15th Reconnaissance Battalion, and coming under long-range fire from lurking M60A1s to which they can't reply...  Not a great position to be in, especially when you are still trying to deploy from a marching column!  Pat was leaving it a little too late in dismounting his infantry here.  APCs are not tanks; they are buses and it is much better to be rid of them too early than it is to wait too long, because then they will die...

In the northern sector, the bridging section was now getting down to business.  Everything had essentially ground to a halt here while the bridging equipment was being deployed.  The lovely AM-50 model in half-deployed position is by Dragoman.  You only need the stand looking like this for a single turn - but the effect is worth it!  Of course, a single bridge across the river was hardly going to let a single battalion across in reasonable time, let alone the following regiment!  More were clearly going to be needed...

And here's the one accompanying 1/20 Tank Battalion as it moves to reinforce 1/68 Motor Rifle Battalion.  This is an armoured  MTU-55, as befits an armoured battalion; the AM-50 is mounted on just a truck.  The excavating vehicle behind is a scratch-built KN-251 (some close-up shots here); it won't see much use in a meeting engagement game like this, but on the defensive such vehicles are quite handy for digging defensive positions.  There are also some APCs here carrying engineering stands attached to this particular battalion.  The engineering aspects of the game are something that Keith McNelly's point-based scenario system entirely dispenses with: you "buy" the defences themselves rather than make them with engineering vehicles you "buy", which is an easy abstraction to make, and quickens things, but leaves an important part of "the game" unrepresented, I feel.


Action at Oberickelsheim - Part V - the battle begins


Pat and Aaron got to my place at 9 in the morning.  After running through the scenario rules with them, they plotted their orders on their maps; together this took up the next hour - Aaron had actually formulated a plan the night before, only to discover in the morning that he hadn't noticed the page detailing the objectives and victory points associated with them, and thus proceeded to rewrite his entire attack plan!  Of course Pat had a much bigger job here, with so many more units.  So turn one (0630 game time) started at 10 o'clock in real time.

Turn 1: the scene is set
To the left you can see how the finished battlefield looked.  I had run out of time the previous night making up woods - there are rather few of them on the board, and those that are there aren't finished yet.  C'est la vie.  The river wasn't also finished properly - the water surface needs smoothing out, painting properly (so the centre is darker than the edges), and then needs to be given a more glossy varnish.  Still, I can't say I'm unhappy with the overall result.  Of course, with so much time invested in making the stuff, I have a vested interested in saying so!  But Pat said he'd have been perfectly happy being just a photographer all day, looking at the spectacle of the thing, so that was nice to hear.

The scenario rules called for a rain check (6 to turn on rain, 6 to turn off rain) not every turn, but every moving phase, so twice a turn in other words.  A single phase's rain would turn freshly ploughed fields (the darkest brown ones) into mud after a single player's movement; it would take three phases' worth of rain to turn all the other ploughed fields (light shades of brown) into mud.  Rain would also stop all aviation, of course; this being 1979, all-weather aircraft are a thing of the future.

Pat's available air assets were some ragtag fixed-wing stuff (the Czechoslovakians were still flying some MiG-15s at this date!), plus a single flight of helicopters: a stand of Mi-4 Hound Bs armed with light rockets, so fine against infantry, but no good against armour, paired with a stand of Hind-Ds - the Czechoslovakian military had only just procured their first MSH stand's worth of Hinds by this time.  All in all, more of a nuisance than a threat.  So overall, Aaron's air assets were the more formidable, despite not including any helicopters at all.

Turn 2 - like 18th century naval lines
As it turned out, rain started falling on the very first check, so the freshly ploughed fields had turned to mud before the end of the first turn.  This was going to complicate Pat's tactics more than Aaron's.  Except for a few jeeps, the American force was entirely tracked, and while mud would slow them down, it wouldn't halt them completely.  In contrast, half of the Czechoslovakian force was wheeled, and thus fast on firm ground, but they couldn't handle the mud at all.  Initially, however, this wasn't much of a concern - there weren't so many freshly ploughed fields around, after all, and at the start of the second turn it stopped raining, anyway, alleviating the worry.  With the rain ceasing planes were potentially soon available... but the advanced recon forces had yet to spot each other, as their paths had unknowingly turned somewhat parallel to each other, just out of spotting distance, or were screened by low rises and hedges.

Turn 3 - enemy? What enemy!
The weather held out during the third turn, but since the recce forces still hadn't spotted each other, the pilots were still on the ground.  At least some combat formation troops were now making their way onto the field.  You can see the first battalions of both OT-64 equipped motor rifle regiments snaking the way along the roads; 1/68 to the fore, 1/51 further away.  And it is possible - but only just - to see a stand from the regimental recon company of the 62nd Motor Rifle Regiment about to enter a village on the far board, presaging the arrival of 1/62 battalion next turn (the other two stands are already in the village).

Crap!  It's them!
Now on the fourth turn, things got more interesting.   The recon forces finally found each other.  It's something of a crap shoot in my experience when this happens - somebody has the initiative, somebody doesn't.  Somebody has the wrong kind of element out in front for what the other guys has, somebody doesn't.  In this case, first blood went to the Czechoslovakian 15th, as their lead element sported a 73 mm main armament, while that of the 3/7th had a 12.7 mm HMG...   But that wasn't the interesting thing.  The rain kicked in again, so no one was going to be bringing any aircraft to help in this particular portion of the fight.  More amusingly, two of Pat's OT-64 stands from 1/51 Battalion where half-way across a not-so recently ploughed field, and before they made it to the other side, it had turned to mud, and they were bogged!  Just what I had hoped might happen when I made the weather rules up, but I never expected it to actually happen.  Ah, umpires, they're evil, I tell you :-)  So Pat was left with a choice: abandon the APCs and slog forward on foot (it was a complete company that was bogged, so that was a viable choice), or wait for the battalion's ARV section to reach them and tow them out.  He chose the latter, as it wasn't far away, but he probably would have saved time overall by just marching forward on foot.